How to use this course
Work top to bottom — each unit builds on the last and advances one continuous game. Read the lesson, watch the linked tutorial(s) to build along, then do the practice task.
Tick Done on each lesson to track progress in the sidebar. Your progress is saved in this browser on this device.
Conceptsthe ideas & nodes introduced
Note2026 / Godot 4.7 best practice
Practicethe hands-on task
▶ Watchcurated video tutorials
Unit goal: Install Godot 4.7, find your way around the editor, and understand the three ideas everything rests on — nodes, scenes, and the running scene tree — plus the game loop and version control.
Godot is a free, open-source game engine released under the permissive MIT license. That single fact shapes everything about it: there are no royalties, no seat fees, and no revenue thresholds — you can ship a commercial game and owe nothing. For a professional developer that removes a whole category of risk that surrounds some proprietary engines.
The distinction that matters most for you is engine versus framework. A framework (like MonoGame or Love2D) hands you drawing and input primitives and expects you to build the rest. An engine gives you a scene editor, an asset pipeline, a physics system, animation tools, and a play button. Godot is a full engine, but an unusually lightweight and code-friendly one — which is why it appeals to programmers who find larger engines heavy. Its 2D support is genuinely first-class: Godot has a dedicated 2D renderer with its own coordinate space and physics, rather than simulating 2D on a 3D plane. This is exactly what you want for a SNES- or Game Boy-style game.
Godot's default language is GDScript, a Python-flavored language built into the engine and tuned for game code. C# is also fully supported if you prefer it. This course uses GDScript because the official materials, the community tutorials, and the fastest iteration loop all center on it — and, as you'll see in Unit 1, it will feel familiar within an hour. Adoption has climbed sharply: the number of Godot games shipping on Steam has roughly doubled every year, so the ecosystem, plugins, and tutorials around you are richer than ever.
Key concepts: MIT license & zero royalties · engine vs. framework · 2D-first rendering · GDScript vs. C# · the current Godot ecosystem.
Practice Install Godot 4.7.1 from the official site, open the Project Manager, and download & run one sample project from the in-editor Asset Store. Note how quickly it launches.
The Godot editor is itself a Godot application, and its layout maps cleanly onto how you'll work. Across the top are the workspaces — 2D, 3D, Script, and the Asset Store — which swap the central viewport for the tool you need. You'll live in the 2D and Script workspaces.
Four docks frame the viewport. The Scene dock (top-left) shows the node tree of the scene you're editing — this is the structure of whatever you're building. The FileSystem dock (bottom-left) is your project's files on disk. The Inspector (right) exposes every property of the currently selected node, and is where a huge amount of game configuration happens without code. The bottom panel hosts Output, the Debugger, the Audio mixer, and more — it's where your print() statements and runtime errors show up.
Spend a few minutes making this space yours. Docks can be dragged and rearranged, and the layout persists per project. Knowing where things live now will save you constant hunting later.
Key concepts: workspaces (2D / Script / Asset Store) · Scene dock · FileSystem dock · Inspector · the bottom panel (Output, Debugger, Audio).
Practice Create a new empty scene, add a few nodes, and save it. Rearrange one dock to a position you prefer, then reset the layout to compare.
This is the most important lesson in the unit. Almost everything in Godot is one of three things, and once they click, the whole engine makes sense.
A node is a single-purpose object: a sprite, a collision shape, a camera, a timer, an audio player. Nodes have properties, methods, and can emit signals. You build behavior by combining many small nodes rather than writing a few large classes. A scene is a tree of nodes saved together as one reusable unit — a player, an enemy, a level, a menu. Scenes are stored as human-readable text (.tscn) files, which is why they diff and merge nicely in Git. Crucially, a scene can be instanced inside another scene: build one coin, then drop a hundred instances into a level. Any change to the coin scene propagates to every instance.
When you press play, Godot assembles your scenes into one live hierarchy called the SceneTree. The tree is not just organization — a node's position in it determines draw order, transform inheritance (children move with parents), and the flow of input and notifications. Thinking in terms of "what nodes make up this thing, and how are they nested" is the core skill of Godot development.
Key concepts: node (single-purpose object) · scene (a saved node tree, .tscn) · instancing · the runtime SceneTree · parent/child transforms & draw order.
Best practice Keep scenes small and single-purpose. You will compose and instance them, not build one enormous scene — the same way you'd favor small, focused classes and functions.
Practice Build a small scene (e.g., a Node2D with a Sprite2D child), save it, then create a parent scene and instance it three times, repositioning each. Confirm that editing the original updates all instances.
Games run as a loop: many times per second the engine processes input, updates state, and draws a frame. Godot exposes this loop through two callbacks you'll override on your scripts. _process(delta) runs once per rendered frame, as fast as the display allows — use it for visuals. _physics_process(delta) runs on a fixed timestep (60 times per second by default) — use it for movement, physics, and anything that must be deterministic.
Both receive delta: the number of seconds since the last call. You'll multiply movement by delta so your game behaves identically whether it runs at 30 or 144 FPS. This is a habit worth forming immediately; Unit 3 drills it in.
On disk, a project is defined by a project.godot file at its root; everything else is scenes, scripts, and assets you organize into folders. A little discipline here pays off — this course uses a folder-per-feature layout (actors, components, levels, systems, ui, data, assets), which you'll see in the appendix of the curriculum.
extends Node2D

func _process(delta: float) -> void:
    # runs every rendered frame; delta = seconds since last frame
    print("frame delta: ", delta)
Key concepts: the main loop · _process vs _physics_process · delta · project.godot · setting the main scene · folder conventions.
Practice Attach the script above to a node, set the scene as your main scene, run it, and watch delta in the Output panel. Then cap the frame rate in Project Settings and observe how delta changes.
Because Godot's scenes and resources are text, the engine is a pleasure to keep under Git — you get meaningful diffs and manageable merges. Set this up on day one so your capstone isn't your first commit.
Two ignore files matter. Your .gitignore should exclude the engine's cache directory .godot/ (regenerated automatically), your exported builds, and any secrets like signing keys. Godot also honors a .gdignore file, which tells the engine itself to skip a folder when scanning for resources — handy for design docs or raw art. Since Godot 4.4, resources carry stable .uid files that you should commit alongside their assets; they let the engine track files even when you move them.
The workflow is ordinary from here: commit early and often, write real messages, and branch for risky features. The payoff is that when a change breaks your game, git diff on a readable .tscn usually shows you exactly what moved.
Key concepts: text scenes = Git-friendly · a Godot .gitignore (ignore .godot/, builds, secrets) · .gdignore · committing .uid files.
Reference The official guide "Version control systems" in the Godot docs (docs.godotengine.org) provides a ready-made .gitignore you can copy.
Practice Initialize a Git repo for your project, add a Godot .gitignore, commit, then move a scene file and read the resulting diff.
Unit goal: Become productive in typed GDScript, understand the node-script lifecycle, reference other nodes cleanly, and use the two features you'll reach for constantly — signals and resources.
GDScript will feel like Python with types and a game-engine standard library. It's indentation-based, uses func for functions and var for variables, and ships with the data structures you expect: Array, Dictionary, and rich built-ins like Vector2 and Color. If you know any C-family or Python-family language, you can read it immediately.
The one habit to adopt from the start is static typing. GDScript is optionally typed: you can write var speed := 200.0 (inferred float) or var speed: float = 200.0 (explicit), and you can annotate function parameters and return types. Typing is not just documentation — it lets the engine catch errors when it parses the script instead of at runtime, produces faster bytecode, and makes autocomplete dramatically more useful. Treat untyped GDScript the way you'd treat any in TypeScript: a last resort.
func apply_damage(amount: int) -> void:
    var new_health: int = clampi(health - amount, 0, max_health)
    health = new_health
    if health == 0:
        die()
Key concepts: variables, functions, control flow · Array / Dictionary · type hints & inference (:=) · why typing improves speed and tooling.
Best practice Type everything you reasonably can — parameters, return values, and variables. It is the single cheapest way to prevent bugs in GDScript.
Practice Port a small algorithm you know (FizzBuzz, a temperature converter, a simple parser) to fully typed GDScript and run it from a script's _ready().
A script in Godot extends a node type, adding behavior to it. When you attach a script to a CharacterBody2D, your script is that body — its properties and methods are yours to use and override. Optionally give the script a class_name so it appears in the node-creation dialog and can be referenced by type elsewhere.
The engine calls a predictable sequence of lifecycle methods. _init() runs when the object is constructed (before it's in the tree — don't touch other nodes here). _enter_tree() fires as it's added to the tree, then _ready() runs once when the node and all its children are in the tree and safe to access — this is where most setup goes. Then _process() and _physics_process() run every frame until _exit_tree() as the node leaves. Knowing this order prevents the classic "null node" bugs that come from touching children too early.
Key concepts: extends & class_name · the order _init → _enter_tree → _ready → _process → _exit_tree · what's safe to access in each.
Practice Write a script that prints a message in each of _init, _enter_tree, _ready, and _exit_tree. Run it, then remove the node at runtime and watch the order in Output.
Two mechanisms connect your code to the scene. The @export annotation promotes a variable into the Inspector, so designers (or future you) can tune it without editing code — @export var speed: float = 200.0 becomes a field you can set per instance. This is how Godot keeps data out of code.
To reference other nodes, prefer robust handles over brittle paths. @onready var sprite := $Sprite2D grabs a child when the node is ready. For nodes deeper in the tree, mark a node as a scene-unique name and access it with the % prefix — %HealthBar — which keeps working even if you reorganize the hierarchy. Long literal paths like $UI/Panel/HBox/HealthBar break the moment you move something, so avoid them.
extends CharacterBody2D

@export var speed: float = 200.0
@onready var sprite: Sprite2D = $Sprite2D
@onready var health_bar := %HealthBar   # scene-unique name
Key concepts: @export and its variants · @onready · $ / get_node() · scene-unique names (%) · groups.
Best practice Reference nodes by unique name (%Name) or exported NodePath, never by long literal paths. Your scenes will change shape constantly early on.
Practice Add an exported speed to a node and tune it in the Inspector. Reference a child two ways — a literal path and a % unique name — then reorder the tree and see which one survives.
Signals are Godot's built-in implementation of the Observer pattern, and they are how nodes stay loosely coupled. A node emits a signal to announce that something happened; other nodes connect to it and react — without the emitter knowing or caring who's listening. Every built-in node ships useful signals (a button's pressed, an area's body_entered), and you can declare your own.
You declare a custom signal with the signal keyword, optionally with typed arguments, then call emit(). Listeners connect with a Callable, usually in code so the wiring is visible and searchable. This "announce, don't command" style is the backbone of clean Godot architecture, and you'll formalize it into an event bus in Unit 7.
extends Node

signal health_changed(new_value: int)

func take_damage(amount: int) -> void:
    health -= amount
    health_changed.emit(health)   # announce; listeners react
Key concepts: the Observer pattern · the signal keyword · emit() · connecting to a Callable · custom signals with arguments · connecting in code vs. the editor.
Practice Declare a health_changed(new_value) signal, emit it whenever health changes, and connect a label that updates itself in response.
Where a Node is something that lives in the tree and does things, a Resource is a shareable bundle of data. Textures, audio streams, tilesets, and animations are all resources — and you can define your own. A custom resource is a class that extends Resource with @exported fields; you then create .tres files from it and edit them in the Inspector like any other asset.
This matters because it lets you separate content from code. An ItemData resource holding a name, value, and icon can be authored by anyone, loaded on demand, and reused across the game. You load resources with load() at runtime or preload() at parse time. Data-driven design — covered fully in Unit 7 — is built entirely on this idea.
class_name ItemData extends Resource
@export var name: String = ""
@export var value: int = 0
@export var icon: Texture2D
Key concepts: Resource vs Node · custom resources with class_name + @export · .tres files · load() vs preload().
Practice Define an ItemData resource, create two or three .tres instances in the editor, and load one at runtime to print its fields.
Unit goal: Design reusable scenes, model entities by composition instead of deep inheritance, and choose the loosest coupling that gets the job done — the habits that keep a game maintainable as it grows.
A scene is the unit of reuse. Build a coin once — its sprite, its collision area, its pickup logic — and you have a self-contained thing you can place anywhere. In the editor you instance a scene by dragging it in; in code you load the PackedScene and call instantiate(), then add the result to the tree.
Because instances stay linked to their source scene, edits propagate: fix the coin's animation once and every coin updates. When you need a one-off tweak, you can enable "editable children" or override exported properties per instance without breaking the link. This is the 2D-game equivalent of prefabs, and it's how you'll spawn enemies, bullets, and pickups throughout the course.
const Coin := preload("res://actors/coin/coin.tscn")

func spawn_coin(at: Vector2) -> void:
    var c := Coin.instantiate()
    c.position = at
    add_child(c)
Key concepts: instancing in editor & code · PackedScene.instantiate() · editable children · per-instance overrides.
Practice Make a reusable coin scene and spawn a field of instances — some placed in the editor, some spawned in code with instantiate().
Coming from OOP, your instinct might be to build a deep class hierarchy: Entity → Character → Enemy → FlyingEnemy. Godot's node system nudges you toward a better pattern for games: composition. Instead of inheriting behavior, you attach it. A player and an enemy don't share a base class so much as they both contain a Health component, a Hurtbox, and a StateMachine — small nodes or scenes, each doing one job.
The payoff is reuse without rigidity. That Health component works unchanged on the player, every enemy, and a destructible crate. You mix and match capabilities per entity rather than forcing everything into one inheritance line, and you avoid the "diamond" problems that come when a flying, swimming, exploding enemy doesn't fit the tree. Inheritance still has its place for genuinely shared, stable behavior — but reach for composition first.
Key concepts: component nodes/scenes (Health, Hurtbox, StateMachine) · reuse across unrelated entities · when a shallow base class is still justified.
Best practice Favor composition: attach small, focused components rather than building deep inheritance chains. A shared component beats a copied subclass.
Practice Refactor a monolithic "player" script into a player scene that composes separate Health and Input component nodes.
As soon as you have more than a couple of nodes, you face a design question: how should they talk? The guideline that keeps Godot projects clean is "call down, signal up." A parent may call methods on its children directly, because it owns them and knows they exist. A child should not reach up and grab its parent; instead it emits a signal and lets whoever's interested respond. This keeps children reusable — they don't depend on where they're placed.
For nodes that are far apart and unrelated (a coin in the level and the score label in the HUD), even signals-up gets awkward. That's the case for a global event bus, which you'll build in Unit 7. For now, practice recognizing the three tools — direct calls downward, signals upward, and groups for "do this to many nodes at once" — and picking the loosest one that works.
Key concepts: "call down, signal up" · groups · direct references vs signals vs (later) an event bus · the cost of tight coupling.
Practice Connect a pickup to a score display two ways — a direct reference and a signal — then move the nodes apart in the tree and see which coupling survives.
Consistency is a force multiplier. Adopt conventions now and your project stays navigable at 200 scenes. The community norm is PascalCase for node names (PlayerHealthBar) and snake_case for files and folders (player_health_bar.tscn). Group by feature, not by type: keep a player's scene, script, and art together under actors/player/ rather than scattering them across global scenes/ and scripts/ folders.
Keep scene trees shallow and give nodes descriptive names — a deep, generically-named tree is as hard to read as deeply nested code. And develop a feel for scene boundaries: a thing that you'll reuse, instance, or reason about on its own deserves to be its own scene. When in doubt, extract.
Key concepts: PascalCase nodes / snake_case files · folder-per-feature layout · shallow trees · deciding where one scene ends and another begins.
Practice Take a small, messy sample (or your Unit 0–1 files) and reorganize it into a folder-per-feature layout with consistent naming. Confirm nothing breaks.
Unit goal: Work fluently in 2D space and vectors, write frame-rate-independent motion, handle input through the Input Map, and build your first real character controller.
Godot's 2D world uses a coordinate system where x increases to the right and y increases downward — the top-left is the origin. That y-down convention trips up newcomers once and then never again; just remember that "up" is negative y, which is why jump code applies a negative vertical velocity.
Every 2D node has a transform: position, rotation, and scale, expressed both locally (relative to its parent) and globally (relative to the world). Because children inherit their parent's transform, moving a parent moves everything under it — the basis of things like a character carrying its health bar. The workhorse type is Vector2, and getting comfortable with its methods pays off everywhere: length(), normalized() (a direction of length 1), dot(), angle_to(), and lerp() for smooth interpolation. Movement, aiming, knockback, and steering are all just vector math.
Key concepts: origin & y-down · local vs global transforms · transform inheritance · Vector2 (length, normalized, dot, angle_to, lerp).
Practice Move a sprite along a normalized direction vector, then make it rotate to face the mouse using angle_to or look_at.
If you move a sprite "10 pixels per frame," it will travel twice as fast on a 120 Hz monitor as on a 60 Hz one — a classic bug. The fix is to think in units per second and multiply by delta, the time elapsed since the last frame. position += velocity * delta moves the same distance per second regardless of frame rate.
Godot gives you two per-frame callbacks. _process(delta) runs every rendered frame — great for visuals and camera work. _physics_process(delta) runs on a fixed timestep, decoupled from rendering, which makes it the correct home for movement, physics, and any logic that must be consistent. As a rule: if it affects gameplay or collisions, put it in _physics_process and scale by delta.
func _physics_process(delta: float) -> void:
    # speed is in pixels PER SECOND; delta makes it frame-independent
    position += velocity * delta
Key concepts: delta · _process (variable timestep) vs _physics_process (fixed) · why gameplay lives in physics · units per second.
Best practice Do movement and physics in _physics_process, always multiplied by delta. Reserve _process for visuals that should run as fast as the display.
Practice Move one sprite with delta and one without. Cap the frame rate to 30, then 144, in Project Settings and watch the delta-less one drift out of sync.
Never hard-code physical keys into gameplay logic. Godot's Input Map (in Project Settings) lets you define named actions — move_left, jump, attack — and bind each to any number of keys, mouse buttons, or gamepad inputs. Your code asks about actions, not keys, so remapping and multi-device support come essentially for free.
There are two ways to read input. Polling — Input.is_action_pressed("jump") — asks "is this held right now?" each frame, ideal for continuous movement. Events — handling _input() or _unhandled_input() — react to discrete moments like a key press, ideal for menus and one-shot actions. For analog movement, Input.get_vector("left","right","up","down") returns a ready-made, correctly-scaled Vector2 that also handles gamepad sticks.
func _physics_process(delta: float) -> void:
    var direction := Input.get_vector("move_left", "move_right", "move_up", "move_down")
    velocity = direction * speed
    move_and_slide()
Key concepts: the Input Map & named actions · polling (is_action_pressed) vs events (_input/_unhandled_input) · get_vector for analog input · supporting keyboard + gamepad.
Best practice Define named actions in the Input Map and reference those, never raw keycodes. Rebindable controls and gamepad support then require almost no extra work.
Practice Define move_* and jump actions, bind each to both a key and a gamepad input, and drive a sprite with get_vector.
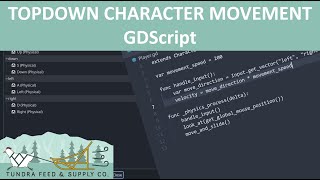
Time to combine everything into a controllable character. For code-driven movement, the right body is CharacterBody2D: it has a built-in velocity property and a move_and_slide() method that moves the body and smoothly slides along walls it hits, without you doing collision math by hand.
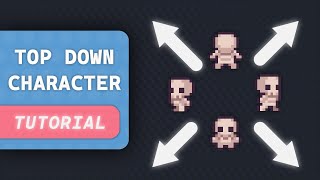
Raw input-to-velocity feels robotic, so add acceleration and friction: ease the velocity toward its target with lerp or move_toward rather than snapping. And remember to normalize diagonal input — pressing right+down shouldn't be 1.4× faster than a cardinal direction. get_vector handles that for you, but it's worth understanding why. The result is a character that accelerates, glides, and stops with weight.
extends CharacterBody2D
@export var speed := 220.0
@export var accel := 1500.0

func _physics_process(delta: float) -> void:
    var dir := Input.get_vector("move_left","move_right","move_up","move_down")
    velocity = velocity.move_toward(dir * speed, accel * delta)
    move_and_slide()
Key concepts: CharacterBody2D · velocity & move_and_slide() · acceleration/friction via move_toward · normalizing diagonals.
Practice — Unit project: Top-Down Roamer. Build a character that explores an empty room with smooth, accelerating, frame-independent movement. You'll animate it next unit.
Unit goal: Import art pixel-perfectly, animate characters with Godot's three complementary tools, drive animation from state, and frame the action with a well-behaved 2D camera.
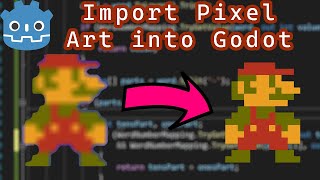
By default Godot smooths textures with bilinear filtering — which turns crisp pixel art into a blurry mess. Fixing this is the first thing to do in any retro-styled project. Set the default texture filter to Nearest (Project Settings → Rendering → Textures), or per-texture in the Import tab, and your pixels stay sharp.
Three settings together produce a truly pixel-perfect image: texture filtering (nearest), a fixed base resolution (e.g., 320×180 for a chunky look), and a viewport stretch mode with integer scaling so the window scales your game by whole multiples (2×, 3×) rather than fractional amounts that shimmer. Get these right once at the project level and every sprite and tilemap inherits the clean, evenly-sized pixels that define the SNES/Game Boy aesthetic. Sprite2D displays a single texture; you'll also use texture atlases to pack many sprites into one image for efficiency.
Key concepts: Sprite2D · nearest-neighbor filtering · base resolution · viewport stretch mode & integer scaling · texture atlases.
Best practice For a retro look, set the default filter to Nearest and enable a stretch mode with integer scaling. This is the difference between crisp and blurry pixel art.
Practice Import a pixel sprite, switch it to Nearest filtering, and configure project-wide integer scaling with a small base resolution. Compare before/after at 3× window size.
AnimatedSprite2D is the classic sprite-sheet animator. It holds a SpriteFrames resource — a collection of named animations (idle, walk, jump), each a list of frames with a playback speed. You slice a sprite sheet into frames in the editor, name your animations, and call play("walk") from code.
Most 2D characters need only a handful of animations plus the flip_h property to face left or right. The art is deciding when to switch: a common beginner approach checks velocity each frame and plays walk when moving and idle when still. That works, but it grows messy fast — which is exactly the problem the AnimationTree and state machines solve in the next lessons.
Key concepts: the SpriteFrames resource · named animations & speed · slicing a sprite sheet · flip_h · driving animation from movement.
Practice Give your roamer idle and walk animations that switch based on whether it's moving, with flip_h for facing.
Where AnimatedSprite2D flips through frames, the AnimationPlayer animates any property of any node over time — position, scale, modulate (tint/opacity), even values on other scripts. It's a full keyframe timeline. Want a chest to pop open, a door to slide, or a sprite to squash-and-stretch on landing? That's AnimationPlayer.
Two features make it especially powerful. Call-method tracks let an animation invoke a function at a specific moment — perfect for firing a sound or spawning dust exactly on a footfall. Signal-emitting and property tracks mean an animation can drive gameplay, not just visuals. Because animations are saved as resources, they're reusable and shareable across scenes.
Key concepts: keyframe tracks · animating position/scale/modulate · call-method tracks · animations as reusable resources.
Practice Author a jump animation with a squash-and-stretch on takeoff and landing, and add a call-method track that plays a sound on the landing frame.
As a character gains states — idle, walk, run, jump, fall, attack — the "check velocity and call play()" approach collapses under its own conditionals. The AnimationTree is the answer. It sits on top of your animations and organizes them into a visual state machine: each state is an animation, and you define the transitions and the conditions that trigger them. Your code just sets a couple of parameters (like "is on floor" or a movement blend value) and the tree picks the right animation.
For directional characters, blend spaces let you smoothly mix animations along an axis — for instance, blending walk animations by facing direction. The AnimationTree keeps animation logic declarative and separate from gameplay logic, which is exactly the separation you want as complexity grows. It pairs naturally with the gameplay state machine you'll build in Unit 7.
Key concepts: the AnimationTree · its state-machine node · transitions & conditions · blend spaces for directional animation.
Practice Move your character's animation into an AnimationTree state machine with idle / walk / jump / fall states driven by movement parameters.
A Camera2D added as a child of your character makes the view follow it automatically. But a camera glued rigidly to the player feels stiff, so Godot provides position smoothing — enable it and set a speed, and the camera eases toward its target instead of snapping. Add limits to stop the camera from showing the void beyond your level's edges, and drag margins to let the character move a little before the camera reacts.
Thoughtful camera work is invisible when done well and jarring when done poorly. A slight look-ahead in the direction of movement, a gentle zoom, and clean limits do a lot for feel. You'll return to the camera in Unit 9 to add screen shake for impact.
Key concepts: Camera2D · position smoothing · limits · drag margins · zoom · look-ahead.
Practice — Unit project: Living Character. Give the roamer a smoothed, bounded follow camera and full idle/walk animation via an AnimationTree. It should read as a character, not a rectangle.
Unit goal: Choose the right physics body for each job, control exactly what collides with what, detect overlaps and triggers, and assemble a responsive platformer controller with the game-feel tricks players expect.
Godot offers four 2D physics nodes, and picking the right one is half the battle. CharacterBody2D is code-driven — you set its velocity and it moves exactly as told, which is what you want for players and most enemies. RigidBody2D is fully simulated: gravity, forces, and bounces happen automatically, ideal for debris, crates, and physics puzzles but wrong for a precise character. StaticBody2D doesn't move — it's your ground, walls, and platforms. And Area2D doesn't collide at all; it only detects overlaps, which makes it perfect for triggers, pickups, and damage zones.
A useful mental split: use CharacterBody2D when you want full control, RigidBody2D when you want the physics engine to take the wheel, StaticBody2D for the immovable world, and Area2D whenever you just need to know "did these two things overlap?"
Key concepts: CharacterBody2D (code-driven) · RigidBody2D (simulated) · StaticBody2D (immovable) · Area2D (detection only).
Practice Drop a few RigidBody2D crates and watch them simulate, then contrast with a CharacterBody2D you steer directly. Feel the difference in control.
Every physics body needs a CollisionShape2D (or polygon) to define its physical footprint. The more interesting part is controlling what collides with what, done through collision layers and masks. A body's layer is what it "is" (player, enemy, world, pickup); its mask is what it "scans for." The player scans the world layer so it lands on ground; an enemy scans the player layer to detect a hit. Naming your layers in Project Settings turns this from cryptic checkboxes into readable design.
One-way collision — jumping up through a platform and landing on top — is built in. In Godot 4.7 a CollisionShape2D can even set its one-way direction relative to the shape, so slanted or rotated one-way platforms behave correctly without hacks.
Key concepts: CollisionShape2D / CollisionPolygon2D · collision layers vs masks · naming layers · one-way platforms (with 4.7's per-shape direction).
Godot 4.7 CollisionShape2D can set the one-way collision direction relative to the shape — a small change that makes angled one-way platforms just work.
Practice Define named layers (player / enemy / world / pickups), set each body's layer and mask, and build one-way platforms you can jump up through and land on.
CharacterBody2D gives you two movement methods. move_and_slide() is the everyday choice: it moves by velocity and automatically slides along surfaces, so a character walking into a wall keeps moving along it instead of sticking. It also tracks helpful state — is_on_floor(), is_on_wall(), and is_on_ceiling() — which you'll use constantly for jump logic. move_and_collide() is lower-level: it moves once and returns collision details for when you want to handle a hit manually (a bullet, a bounce).
Slopes and stairs are where platformers get fiddly. move_and_slide() handles slopes well when you configure the floor's max angle and snapping, so your character sticks to downhill ground instead of launching off it. Getting ground detection solid here makes the feel work in the next lesson possible.
func _physics_process(delta: float) -> void:
    if not is_on_floor():
        velocity.y += gravity * delta
    move_and_slide()
    if is_on_floor():
        # reset jump state, play land effects, etc.
        pass
Key concepts: move_and_slide() vs move_and_collide() · is_on_floor/wall/ceiling · KinematicCollision2D · slopes & snapping.
Practice Implement gravity and reliable ground detection, then test it on flat ground, slopes, and the edges of platforms.
Area2D is the "did these overlap?" node, and it's one of the most useful tools in 2D games. It emits body_entered / body_exited when a physics body enters or leaves it, and area_entered / area_exited for other areas. Connect those signals and you have coins that collect on touch, doors that open when you approach, checkpoints, damage zones, and cutscene triggers — all without a single collision-resolution line.
Two properties matter: monitoring (this area watches for overlaps) and monitorable (other areas can detect this one). Combined with the layer/mask scheme from Lesson 5.2, areas let you express precise rules like "only the player triggers this door." This same pattern powers the hitbox/hurtbox combat system in Unit 8.
Key concepts: body_entered/area_entered (and exited) · monitoring vs monitorable · triggers, zones, and pickups · layer/mask filtering.
Practice Build a trigger zone that fires an event when the player enters, and a coin that plays a sound and frees itself on overlap.
Correct movement and good-feeling movement are different things, and the gap is filled by a handful of well-known tricks. Start with the basics: apply gravity each frame, and on jump set velocity.y to a negative value. You can compute that value from a desired jump height rather than guessing. Allow variable jump height by cutting the upward velocity short when the player releases the button.
Then add the two features that separate a responsive platformer from a frustrating one. Coyote time gives the player a few frames to still jump just after walking off a ledge — because they almost certainly meant to. Jump buffering remembers a jump pressed a few frames before landing and executes it the instant they touch ground. Neither is visible to players, but both are felt immediately. Build them in from the start.
# Coyote time + jump buffer (sketch)
if is_on_floor(): coyote = COYOTE_TIME
else: coyote -= delta
if Input.is_action_just_pressed("jump"): buffer = BUFFER_TIME
else: buffer -= delta
if buffer > 0.0 and coyote > 0.0:
    velocity.y = JUMP_VELOCITY
    buffer = 0.0; coyote = 0.0
Key concepts: gravity · jump velocity from height · variable jump · coyote time · jump buffering · apex hang / fast-fall.
Best practice Coyote time and input buffering aren't polish — they're core to how a platformer feels. Players won't name them, but they'll feel their absence.
Practice — Unit project: Platformer Prototype. Build a responsive side-scroller: gravity, variable jump, one-way platforms, hazards, coyote time, and jump buffering. A/B test with the feel features off.
Unit goal: Build tile-based levels with the current TileMapLayer workflow, paint connected terrain, make tiles interactive with collisions and custom data, add parallax depth, and populate levels fast.
Tilemaps let you paint a whole level out of a small set of reusable tiles — the technique behind nearly every 2D game of the SNES era. In current Godot the workflow has two halves. A TileSet is a resource that defines your palette: it points at one or more source images (atlases) and slices them into tiles. A TileMapLayer node is a canvas you paint those tiles onto.
The important modern detail: as of Godot 4.3 the old monolithic TileMap node is deprecated in favor of one TileMapLayer node per layer, all sharing a single TileSet. So a level might have a Background layer, a Terrain layer with collisions, and a Foreground layer — each its own node. This gives a clearer scene tree and a simpler API. If a tutorial you find uses a single TileMap with internal layers, it predates this change; the concepts transfer, but use TileMapLayer nodes.
Key concepts: TileSet resource & atlas sources · TileMapLayer (one per layer) · painting tiles · why the tree has multiple layer nodes.
Godot 4.3+ Use TileMapLayer, not the deprecated TileMap. One node per layer, sharing a TileSet, is the current best practice and what the docs assume.
Practice Build a TileSet from an atlas and paint a small level using separate Background, Terrain, and Foreground TileMapLayer nodes.
Hand-placing every edge, corner, and inner-corner tile is tedious and error-prone. Terrains (Godot's autotiling system) solve this: you tag which tiles are "ground," describe how they connect using peering bits, and then paint with a single terrain brush while the engine picks the correct tile for each cell automatically. Draw a blob of dirt and the grassy edges resolve themselves.
Godot 4.5 improved autotiling to behave more predictably, but the terrain editor still has rough edges for complex cases. The community plugin Better Terrain is widely recommended — it implements a reliable 3×3 matching algorithm and is often the first thing experienced developers install for anything procedural. Learn the built-in system first so you understand the model, then reach for Better Terrain when a project needs it.
Key concepts: terrain sets & peering bits · single-brush autotiling · improvements in 4.5 · the Better Terrain plugin for reliable 3×3 terrains.
Practice Set up a ground terrain and paint a continuous landscape whose edges and corners resolve automatically. Try the Better Terrain plugin on the same tiles.
Tiles aren't just pictures — the TileSet lets you attach behavior to them. In the TileSet editor you can give tiles physics layers (collision shapes, so terrain is solid), navigation layers (so enemies can path over walkable tiles), and occlusion layers (so tiles cast 2D shadows). You define these once on the TileSet and every painted tile inherits them.
The most powerful feature is custom data layers: arbitrary named values you attach to tiles — a damage number on lava, a friction value on ice, an is_ladder flag. At runtime you can query the tile under a point and read its data, letting level design drive gameplay directly from the tiles you paint. It's a clean, data-driven alternative to littering the level with invisible trigger nodes.
Key concepts: physics / navigation / occlusion layers in the TileSet · custom data layers (e.g., damage, friction) · reading tile data at runtime.
Practice Tag hazard tiles with a damage custom-data value and have the player read that value on contact to take the right amount of damage.
Parallax — background layers that scroll slower than the foreground — gives a flat 2D scene a convincing sense of depth. Distant mountains drift slowly, mid-ground trees a bit faster, and the play layer moves at full speed. Godot's modern Parallax2D node makes this straightforward: set a scroll scale per layer and it offsets automatically as the camera moves, with built-in support for seamless repeating backgrounds.
A related tool is CanvasLayer, which draws independently of the game world's camera — perfect for keeping your HUD fixed on screen and your far background detached from world coordinates. Together they let you separate "world," "background," and "UI" into clean, independently-scrolling planes.
Key concepts: the Parallax2D node · per-layer scroll scale · repeating backgrounds · CanvasLayer for HUD/background separation.
Practice Build a multi-layer parallax backdrop that drifts at different speeds as the camera follows the player, with a seamlessly repeating far layer.
Once the terrain exists, you fill the level with collectables, enemies, and decoration. Dragging in scene instances one at a time is slow, so Godot 4.7 added Scene Paint Mode — press B in the 2D editor and you can brush instances of a scene directly into the world, scattering coins, enemies, or foliage the way you paint tiles. It's a major speed-up for the decoration pass.
For gameplay placement, marker nodes (Marker2D) act as named spawn points your code reads at runtime — enemy spawns, checkpoints, level entrances. Combining painted decoration with a handful of well-placed markers keeps levels fast to author and easy to reason about.
Key concepts: Godot 4.7 Scene Paint Mode (the B key) · scattering scene instances · Marker2D spawn points.
Godot 4.7 Scene Paint Mode lets you brush scene instances into the 2D editor — a big time-saver for placing collectables, enemies, and decorations versus dragging nodes individually.
Practice — Unit project: First Level. Author a complete platformer level: layered tilemaps, autotiled terrain, hazard tiles with custom data, a parallax backdrop, and entities placed with Scene Paint Mode and markers.
Unit goal: Structure behavior with finite state machines, decouple distant systems with a signal-based event bus, use autoload singletons without creating a tangle, drive content with data resources, and move between scenes cleanly.
By now your character script is probably a thicket of booleans — is_jumping, is_attacking, can_move — and their interactions are getting hard to reason about. A finite state machine untangles this. The entity is always in exactly one state (Idle, Run, Jump, Fall, Attack); each state knows how to update itself and which states it can transition to. Logic that used to be scattered across conditionals becomes local to a state.
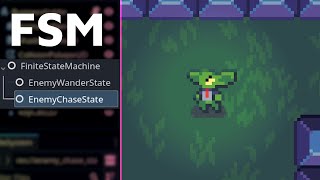
The idiomatic Godot approach is a node-based FSM: a StateMachine node with one child node per state. The machine delegates _physics_process to the current state, and states request transitions by name. Because states are just nodes, they're easy to inspect, enable, and debug. This same pattern drives both the player and, in the next unit, your enemies.
Key concepts: the state pattern · node-based FSM (states as child nodes) · enter/exit/update · transitions · reusing the pattern for enemies.
Practice Refactor your platformer character into an FSM with Idle, Run, Jump, and Fall states, each in its own node.
Local signals are perfect for nearby nodes, but they get awkward when a coin in the level needs to tell the HUD to update the score — those nodes are far apart and shouldn't know about each other. The solution is a global event bus: a single autoload that declares game-wide signals like coin_collected and player_died. Anything can emit them; anything can listen. The coin shouts "collected!" into the bus, and the HUD, the audio manager, and the achievement tracker all react independently.
The key discipline is that the bus should be stateless — think of it as a post office, not a warehouse. It relays messages; it does not store game data. Keep its signals domain-specific and meaningful, and resist the temptation to route everything through it, which recreates spaghetti in a new form. Nearby nodes should still use local signals and direct calls.
# EventBus.gd — registered as an autoload named "Events"
extends Node
signal coin_collected(total: int)
signal player_died

# anywhere: Events.coin_collected.emit(new_total)
# HUD: Events.coin_collected.connect(_on_coin_collected)
Key concepts: the Observer pattern at scale · local signals vs a global event bus · the stateless bus ("post office, not warehouse") · domain signals · avoiding signal spaghetti.
Best practice Use a stateless event-bus autoload for distant, unrelated nodes — but keep it a relay, not a data store. Nearby nodes still talk with local signals.
Practice Add an Events autoload and route score and health changes through it, replacing any reference-chaining up the tree.
An autoload (also called a singleton) is a node Godot loads once and keeps alive for the whole game, accessible by name from anywhere. They're the right home for genuinely global managers: a GameManager tracking score and lives, an AudioManager, a SceneManager. Used well, they're invaluable.
Used carelessly, they become global variables with all the coupling that implies. Three rules keep them healthy. First, don't access other autoloads in _init() — they may not exist yet; use _ready(). Second, never create circular dependencies between them; if two need to talk, use signals or pass a reference. Third, and most important, never store scene-specific state in an autoload — because it persists across scene changes, that state will leak into the next level and cause baffling bugs. Global managers hold global data; everything else stays in its scene.
Key concepts: good candidates (GameManager, AudioManager, SceneManager) · anti-patterns: no autoload access in _init(), no circular deps, no scene-specific state.
Best practice Use autoloads sparingly and only for global managers. Access them in _ready(), never _init(), and keep per-scene state out of them.
Practice Build a GameManager autoload that tracks score and lives across scene changes, and verify the data persists correctly when you switch levels.
Revisit the custom resources from Unit 1 with an architectural eye. Instead of hard-coding enemy stats in scripts, define an EnemyData resource with speed, health, damage, and a sprite, then create a .tres file per enemy type. A single enemy scene reads its EnemyData and configures itself — so adding a new enemy is authoring a data file, not writing code. The same idea covers items, weapons, levels, and dialogue.
This data-driven style separates content from logic, which is transformative for iteration: you (or a designer) can balance the whole game by editing resource files, and you can build tools that generate or tweak them in bulk. It also keeps your scenes generic and your codebase small. Export arrays of resources to build tables — a list of ItemData for a loot pool, a list of WaveData for a spawner.
Key concepts: custom Resource types for enemies/items/levels · exporting arrays of resources · swapping data without touching logic · authoring .tres files.
Practice Define an EnemyData resource, author two or three variants as .tres, and spawn enemies that configure themselves entirely from the data.
Real games move between menus, levels, and game-over screens. The simplest tool is get_tree().change_scene_to_file(), which swaps the whole current scene for another. For anything beyond the basics, wrap this in a SceneManager autoload that centralizes transitions — so every scene change can fade out, load, and fade in consistently, and you have one place to add a loading screen when a level gets big.
Passing data between scenes is the common snag. Because change_scene_to_file() frees the old scene, you can't hand data directly from one to the next — route it through your GameManager or SceneManager autoload, or preload the next scene and set properties before adding it. A simple fade via an AnimationPlayer or Tween on a full-screen ColorRect makes transitions feel intentional rather than jarring.
Key concepts: change_scene_to_file() / change_scene_to_packed() · a SceneManager autoload · passing data across scenes · loading screens & fade transitions.
Practice — Unit project: Architected Build. Refactor the platformer onto FSM characters, an Events bus, a GameManager, data-driven enemies, and a SceneManager with fade transitions.
Unit goal: Implement combat, enemies with simple AI, spawning, collectibles and progression, a UI layer, and save/load — assembling them into a genuine vertical slice of a game.
Combat is best built from small, reusable components — a direct payoff of Unit 2. A Health component holds current/max HP and emits health_changed and died signals. A Hurtbox is an Area2D that receives damage; a Hitbox is an Area2D that deals it. When a hitbox overlaps a hurtbox, it passes along a damage value, the hurtbox tells its Health component, and everyone downstream reacts via signals.
Because these are components, the exact same Health/Hurtbox pair works on the player, every enemy, and a breakable crate — you configure, you don't duplicate. Layer in the details that make combat feel fair: brief invincibility frames after a hit so the player isn't chain-damaged, and a touch of knockback for impact. Collision layers keep it tidy: the player's hitbox scans the enemy hurtbox layer, and vice versa.
Key concepts: a Health component · Hitbox/Hurtbox as paired Area2Ds · damage signals · i-frames & knockback · layer/mask setup.
Practice Build a component-based damage system — a Health node plus Hitbox/Hurtbox — and reuse it unchanged on both the player and an enemy.
Enemy behavior is a natural fit for the state machine from Unit 7: a typical enemy cycles through Patrol, Chase, and Attack states. In Patrol it walks between points; a RayCast2D or detection Area2D gives it line-of-sight, and spotting the player transitions it to Chase; getting close enough transitions to Attack; losing sight returns it to Patrol. Expressing this as states keeps it readable and, crucially, debuggable — you can always see which state an enemy is in.
For movement that respects walls and gaps, Godot's NavigationAgent2D plus a navigation region lets enemies pathfind around obstacles instead of walking into them. Start simple — a patroller that chases on sight is plenty for your slice — and add sophistication only where the game needs it.
Key concepts: patrol / chase / attack via FSM · line-of-sight with RayCast2D · pathfinding with NavigationAgent2D & navigation regions.
Practice Build a patrolling enemy that spots the player via line-of-sight, gives chase, and returns to patrol when it loses sight.
Spawning is just runtime instancing: load a PackedScene, instantiate() it, position it, and add it to the tree — the pattern behind bullets, enemy waves, and pickups. A spawner node encapsulates this, often driven by data (a WaveData resource) so you can design encounters without code.
When you're creating and destroying many short-lived objects — bullets in a shooter, particles, hit effects — constant allocation and queue_free() can cause stutters and garbage. Object pooling fixes this: pre-create a batch of objects, hide and reuse them instead of freeing them, and you pay the allocation cost once. It's the same optimization you'd apply to any hot allocation path in a backend service. And always free nodes with queue_free(), which defers deletion safely to the end of the frame rather than yanking a node out mid-processing.
Key concepts: runtime instancing · spawners (data-driven) · object pooling for bullets/effects · safe deletion with queue_free().
Practice Build a projectile spawner, then convert it to a pool that reuses a fixed set of bullet instances instead of freeing and recreating them.
Collectibles turn a space into a game. Mechanically they're an Area2D pickup (Unit 5) that, on overlap, updates some state and frees itself — announcing the change through your event bus so the HUD and audio react. From that primitive you build counters (coins, score), gated progression (keys that open matching doors), and a simple inventory backed by ItemData resources.
Keep the data for progression in your GameManager or a dedicated inventory object, not scattered across pickups — that way it survives scene changes and is trivial to save. Progression is where your architecture from Unit 7 earns its keep: a coin emits coin_collected, the GameManager updates the total, and the HUD reflects it, with no node reaching across the tree to another.
Key concepts: pickups & counters · keys/doors gating · a simple inventory backed by resources · routing progression through the event bus & GameManager.
Practice Add collectible keys that open a matching door and update an on-screen count, with the count living in your GameManager.
Game UI uses a separate family of nodes: Control nodes, not Node2D. Controls understand layout — anchors pin them to edges or centers, and containers (VBox, HBox, Grid, Margin) arrange their children automatically so your HUD adapts to any resolution. If you've built responsive layouts on the web, the mental model of anchors and containers will feel familiar, like flexbox for the game screen.
Build your HUD (health bar, score) and menus (main, pause, game-over) from Controls placed on a CanvasLayer so they stay fixed regardless of the camera. Wire buttons with their pressed signal, and feed the HUD from your event bus so it updates itself. Don't forget focus and navigation — set up keyboard/gamepad focus order so menus are playable without a mouse, which also makes your game far more accessible.
Key concepts: Control vs Node2D · anchors & offsets · containers (VBox/HBox/Grid/Margin) · themes · focus & navigation · wiring UI to the event bus.
Practice Build a HUD (health + score) and a pause menu that toggles on an action, feeding the HUD from your event bus.
Persistence has one non-negotiable rule: write to the user:// path. It's the per-user, writable, platform-correct location Godot maps to the right place on every OS — never write next to your game files, which may be read-only once installed. From there you choose a format. JSON is human-readable and easy to debug. Saving via ResourceSaver or a config file suits structured data. Pick what fits, and decide deliberately what to save: usually progression and settings, not the entire live scene.
Two habits save future pain. Version your save format from the first release — store a version number so later updates can migrate old saves instead of breaking them. And be cautious loading resource-based saves from untrusted sources, since resources can carry executable logic. For a single-player game saving locally, a versioned JSON of your GameManager's state is a clean, robust default.
Key concepts: the user:// filesystem · JSON vs ResourceSaver/config files · deciding what to save · versioning saves · the security caveat of loading resources.
Best practice Save to user:// and version your format from day one. Store progression and settings, not the whole live scene.
Practice — Unit project: Vertical Slice. Assemble one polished level: combat, a chasing enemy, keys & a door, a HUD, a pause menu, and working save/load to user://.
Unit goal: Add music and sound cleanly, animate with tweens, layer on "juice," build effects with particles and simple shaders, and light a 2D scene — turning the vertical slice from functional into satisfying.
Sound is half of game feel and easy to underrate. Godot plays audio through AudioStreamPlayer (non-positional — music, UI clicks) and AudioStreamPlayer2D (positional — a sound that's louder when its source is near the camera). Above individual players sits the audio bus system: route music to a "Music" bus and effects to an "SFX" bus, and you get independent volume control, effects, and the ability to duck the music under important sounds.
Wrap playback in an AudioManager autoload so any part of the game can request a sound without wiring up players everywhere, and so your options menu can adjust bus volumes in one place. Even a few well-chosen sounds — a jump, a coin, a hit — transform how a game reads.
Key concepts: AudioStreamPlayer / AudioStreamPlayer2D · audio buses & effects · an AudioManager autoload · ducking music under SFX.
Practice Route music and gameplay SFX through separate buses with independent volume, played via an AudioManager autoload.
A tween animates a value from A to B over time, in code, with an easing curve — no keyframes required. create_tween() returns a tween you can tell to move a property (tween_property), wait, call a method, or run steps in sequence or parallel. Tweens shine for quick, one-off, or dynamic motion: a menu that pops in, a coin that bounces when collected, a sprite that flashes white when hit, a bar that slides to its new value.
The rule of thumb: use the AnimationPlayer for authored, repeatable animations you design on a timeline, and tweens for programmatic motion whose targets you compute at runtime. Easing (ease-in, ease-out, elastic, bounce) is what makes tweened motion feel intentional rather than mechanical.
var t := create_tween()
t.tween_property(self, "scale", Vector2.ONE, 0.2)\
 .from(Vector2.ZERO).set_trans(Tween.TRANS_BACK).set_ease(Tween.EASE_OUT)
Key concepts: create_tween() · tween_property · easing & transitions · chaining vs parallel · tweens vs AnimationPlayer.
Practice Tween three effects: a menu pop-in, a collectible bounce, and a damage flash on the player sprite.
"Juice" is the collective term for the small feedback effects that make actions feel powerful: screen shake on impact, hit-stop (a few frames of frozen time when a blow lands), squash-and-stretch, a camera punch, a flash, a burst of particles. Individually each is tiny; together they turn a limp interaction into a satisfying one. The same jump feels twice as good with a bit of dust, a squash on landing, and a subtle camera settle.
The essential counter-skill is restraint. Juice is seasoning — too much shake and flash becomes noise that fatigues players and obscures the action. Add effects deliberately, tune them down until they're felt but not distracting, and reserve the biggest reactions for the biggest moments.
Key concepts: screen shake · hit-stop / freeze frames · squash-and-stretch · camera punch · impact particles · restraint.
Practice Add screen shake and a few frames of hit-stop to a successful hit, then tune both down until they feel good rather than overwhelming.
Particles spray many small sprites to make dust, sparks, smoke, and explosions. GPUParticles2D runs the simulation on the graphics card (cheap for huge counts), while CPUParticles2D runs on the CPU (more flexible, better for small counts and web). You shape their behavior with a process material: emission shape, velocity, gravity, color-over-lifetime.
Shaders are small programs that run per-pixel on the GPU, and 2D CanvasItem shaders unlock effects you can't get otherwise: a hit flash, a dissolve, an outline, water, or a palette swap. They look intimidating but the 2D basics are approachable — a uniform you set from code and a fragment function that tweaks color. Godot 4.7 also adds DrawableTexture2D, a friendly way to draw onto a texture at runtime for fog-of-war masks, minimaps, and paint mechanics without dropping to low-level rendering.
Key concepts: GPUParticles2D vs CPUParticles2D · process materials · CanvasItem shaders (uniforms, fragment) · hit flash / dissolve / outline · DrawableTexture2D (4.7).
Godot 4.7 DrawableTexture2D gives an accessible way to draw onto textures at runtime — great for fog-of-war, minimap markings, and paint mechanics.
Practice Write a hit-flash shader on the player and trigger a dust particle burst on landing.
Lighting sets mood. In 2D, a CanvasModulate node tints the whole scene — drop the world to a deep blue and you have night. Then PointLight2D and DirectionalLight2D add light sources: a torch, a glowing pickup, moonlight. Pair lights with LightOccluder2D shapes and your walls cast real-time shadows, which is dramatic for exploration and stealth. For extra richness, sprites can carry normal maps so light appears to catch their surface detail.
Godot 4.7 drives HDR displays directly for both 2D and 3D, so bright highlights can genuinely pop on capable monitors. Lighting is easy to overdo — start subtle, and remember that a single well-placed light and a dark ambient tint often reads better than a scene full of competing sources.
Key concepts: CanvasModulate · PointLight2D / DirectionalLight2D · LightOccluder2D shadows · normal maps · HDR output in 4.7.
Practice — Unit project: Juiced Slice. Give the vertical slice a full feel pass: audio, tweened UI, screen shake + hit-stop, impact particles/shaders, and a torch-lit scene with occluder shadows.
Unit goal: Diagnose bugs with the editor's tools, measure and improve performance, write automated tests for game code, and wire those tests into continuous integration.
Godot's debugger will feel familiar. You set breakpoints in the script editor, and when hit you can step through code and inspect variables and the call stack. The features that are special to a game engine are the remote scene tree and remote inspector: while the game runs, you see the live tree and can inspect and even edit any node's properties in real time — invaluable for "why is this enemy in the wrong state?" questions that a static breakpoint can't answer.
Lean on the Output panel for print() and the Errors/Warnings it surfaces, and use custom debug drawing (draw a ray, a detection radius, a velocity vector) to see invisible state. Most gameplay bugs are really "the node isn't what I think it is," and the remote tree shows you the truth instantly.
Key concepts: breakpoints & stepping · the remote scene tree & remote inspector · errors/warnings · custom debug drawing.
Practice Introduce a deliberate bug (e.g., a wrong state transition), then find it using a breakpoint and the live remote scene tree.
The first rule of optimization is to measure. Godot's profiler shows where each frame's time goes — script functions, physics, rendering — and the monitors track FPS, draw calls, node counts, and memory over time. Together they tell you whether you're CPU-bound in a hot function, drowning in draw calls, or leaking nodes, so you fix the real bottleneck instead of a guessed one.
Common 2D wins: reduce draw calls by batching and using texture atlases, cull off-screen work, avoid creating garbage every frame (this is where object pooling from Unit 8 pays off), and keep heavy logic out of per-frame callbacks when an event or timer would do. For a retro-scale 2D game you'll rarely be pushing limits — but the discipline of profiling before optimizing is a career-long habit worth practicing here.
Key concepts: the profiler · monitors (FPS, draw calls, memory) · physics vs process cost · 2D batching & culling · avoiding per-frame allocations.
Best practice Always profile before optimizing. The profiler and monitors show where time actually goes; intuition about "slow" code is usually wrong.
Practice Build a deliberately heavy scene (hundreds of nodes or particles), profile it, identify the hot spot, and cut its cost measurably.
Games can and should be tested — a message worth hearing if you're used to test suites elsewhere. Pure logic is the easy, high-value target: your Health component, inventory math, state-machine transitions, and save/load round-trips are all straightforward unit tests. Two frameworks dominate: GUT (Godot Unit Testing) is the go-to for GDScript-only projects, while GdUnit4 adds first-class C# support and a scene runner, and integrates cleanly with CI.
Behavior that depends on the tree and input needs a scene runner — GdUnit4's SceneRunner can instantiate a scene, simulate input and frames, and assert on the result (e.g., "the character is on the floor after landing"). You don't need 100% coverage; a handful of tests around your riskiest, most-reused systems catches the regressions that hurt most, and lets you refactor with confidence.
Key concepts: GUT (GDScript) vs GdUnit4 (C# + scene runner) · unit vs integration tests · SceneRunner for scenes & input · TDD basics · assertions & mocking.
Best practice Unit-test pure logic (health, inventory, state transitions); use a scene runner for tree- and input-dependent behavior; run it all in CI.
Practice Write unit tests for your Health component and a scene test verifying a pickup increments the score.
Automate the checks so quality doesn't depend on remembering. Godot can run headless (no window) from the command line, which lets a CI service run your GUT/GdUnit4 suite on every push. Both frameworks emit JUnit XML, so results slot straight into a GitHub Actions workflow with a green/red status on each commit and pull request.
Round it out with ordinary hygiene you already practice: a consistent project structure (the folder-per-feature layout), a shared code style, and small, reviewable commits. The engine may be new, but the software-engineering fundamentals that served you for twenty years apply unchanged — testing and CI are where they meet game development.
Key concepts: headless Godot · running tests in CI (JUnit XML) · a GitHub Actions workflow · project structure & code style.
Practice — Unit project: Test & Tune. Add a test suite plus a GitHub Actions workflow that runs it on every push, and attach a short profiling report showing one measured optimization.
Unit goal: Understand Godot's export pipeline and publish your game to desktop, the web (itch.io), and mobile — then prepare a responsible release.
Exporting turns your project into a standalone build. It requires export templates — precompiled engine binaries that must exactly match your Godot version (4.7.1 templates for a 4.7.1 project). You then create an export preset per target platform (Windows, Linux, macOS, Web, Android, iOS) that captures its settings. A one-time setup, and thereafter exporting is a couple of clicks.
Understand the difference between debug and release builds (release strips debugging and is what you ship), and know that feature tags let you branch behavior per platform when needed. Start by exporting a desktop build of your slice — it's the simplest target and confirms your templates are installed correctly.
Key concepts: export templates (match the engine version) · export presets · feature tags · debug vs release · resource packs.
Practice Install the 4.7.1 export templates and export a desktop build of your slice; run it outside the editor.
A web build is the easiest way to share a game — anyone can play it in a browser, no download. Godot's Web export compiles to WebAssembly + WebGL 2.0 (with wasm64 available in 4.7), producing an index.html plus supporting files. itch.io is the standard host: zip the exported files with index.html at the root of the zip, create an HTML project, upload, and tick "This file will be played in the browser."
One gotcha trips up almost everyone in 2026: Godot's web builds use threading, which requires cross-origin isolation (the SharedArrayBuffer feature). On itch.io there's a checkbox — "SharedArrayBuffer support" — that makes it serve the required COOP/COEP headers. Miss it and the game won't start. Also note that web export currently supports GDScript, not C# — another reason this course centers on GDScript.
Key concepts: WebAssembly + WebGL 2.0 (wasm64 in 4.7) · the SharedArrayBuffer/COOP-COEP requirement · itch.io upload (zip with index.html at root) · GDScript-only web limitation.
2026 gotcha On itch.io, enable "SharedArrayBuffer support" so it serves COOP/COEP headers — without it a Godot web build won't launch.
Practice Export a web build and publish it on itch.io as a playable-in-browser game, with SharedArrayBuffer enabled.
Mobile follows the same pattern with platform-specific setup. For Android you install the Android build template and set up a keystore for signing; Godot 4.7 smooths this considerably, with a more stable on-device build workflow so you can export and test directly from an Android device. iOS requires a Mac with Xcode and Apple's signing, and is a heavier lift.
The design work matters more than the export button: touch input replaces keyboard and gamepad (on-screen controls, gestures), and you must handle a wide range of screen sizes and aspect ratios — the stretch and scaling settings from Unit 4 do the heavy lifting here. If mobile is a real target, design for touch from the start rather than bolting it on.
Key concepts: Android build templates, keystore & signing · 4.7's smoother on-device Android workflow · iOS (Xcode + signing) overview · designing for touch & screen sizes.
Practice Export a signed Android build and run it on a device or emulator; add a simple on-screen control for one action.
Shipping is more than an export. Give your build a version, write a store or itch page with screenshots and a clear description of controls, and include credits — your own plus any third-party assets and their licenses. Godot itself asks only that you acknowledge its copyright and its third-party components; it's good practice and easy to satisfy with an in-game credits or licenses screen.
Before you announce it, playtest with people who aren't you — you'll learn more from watching five minutes of a stranger playing than from hours of your own testing. Fix what confuses them, then release. Plan for a small post-launch patch or two; finishing and shipping, even imperfectly, is the whole skill.
Key concepts: versioning · credits & third-party licenses (incl. Godot's) · a store/itch page · playtesting & feedback loops · post-launch patches.
Practice — Unit project: Ship It. Publish the vertical slice as a browser build on itch.io (optionally desktop/Android too), with a store page, controls, and credits.
Capstone goal: Take a game from concept to a public release on your own, applying everything from the course. Scope is deliberately small; completeness and polish are the point. Work through the six milestones in order.
Your first game won't fail because of your skill or your engine — it'll fail from scope creep. So start by ruthlessly containing it. Write a one-page design doc: the core loop (the thing the player does over and over), the single hook that makes it interesting, and the target platform. Then write a second list — "stretch goals" — and put everything else on it. Whatever you think is small, cut it in half. A finished tiny game teaches you more than an unfinished ambitious one.
Deliverable: a one-page GDD with the core loop, the hook, the target platform, and an explicit out-of-scope list.
Practice Write your one-page GDD and list everything that is explicitly out of scope for v1.
Before any art, build the smallest playable version of your core loop with placeholder graphics ("graybox"). The only question that matters here is: is it fun? Iterate quickly and cheaply until the answer is yes — or until you decide to change the idea. It's far better to discover a mechanic is flat with rectangles than after a week of pixel art.
Deliverable: a grayboxed, playable core loop you've confirmed is fun.
Practice Build the prototype and get at least one other person to play it before moving on.
Now build the real thing on the architecture from Unit 7 — FSMs, an event bus, data-driven content — so it stays manageable. Create your levels and systems, and integrate art and audio. Data-driven design pays off here: author content as resources so you can add and tune it quickly without rewriting logic.
Deliverable: the full game's levels, systems, and content, built on clean architecture.
Practice Implement the complete content of your scoped game, committing regularly.
Apply the Unit 9 feel pass — audio, juice, lighting — plus a UX and accessibility pass: readable UI, remappable controls, and options that respect players. Define a "bug bar" (which severities must be fixed before release) and drive your known issues down to it. Polish is finite; decide what "good enough to ship" means and stop there.
Deliverable: a game that feels good, is accessible, and meets your bug bar.
Practice Do a feel + accessibility pass and resolve all bugs above your defined bar.
Add automated tests around your riskiest systems (Unit 10) so last-minute changes don't break them, and do a profiling pass against a frame-time budget for your target platform — especially important for web and mobile builds. You don't need exhaustive coverage; you need confidence in the parts that would ruin the game if they broke.
Deliverable: a test suite for critical systems and a build that hits your performance budget.
Practice Write tests for your two riskiest systems and profile until you meet your target frame time.
Export, build a store page, run a final round of outside playtests, and ship it. Then write a short postmortem: what went right, what went wrong, and what you'd do differently next time. Publishing — even something small and imperfect — is the milestone that turns you from someone learning game development into someone who makes games. This is your portfolio piece.
Deliverable: a shipped, playable game on at least one platform, its source under version control with tests and CI, plus a one-page postmortem.
Practice Release the game publicly and write your postmortem. You're done — go make the next one.
Essential channels & courses
Official documentation & tools
- Godot Engine documentation: the manual, class reference, and the official "Your first 2D game" tutorial.
- GUT and GdUnit4: the two testing frameworks from Unit 10.
- itch.io: where you'll host your web build and find free art/audio to prototype with.
How to keep learning
- Rebuild a favorite retro mechanic in isolation (a Mega Man slide, a Zelda dungeon room, a Metroid door) to study it.
- Join a short game jam once you finish the capstone — a hard deadline is the best teacher of scope.
- Read the source of small open-source Godot games to see how others structure real projects.